
In this article, you’ll learn:
Uh, studio lighting. A hard nut for many of us… Here in Ukraine we have very different weather conditions throughout a year, so quite often studio is the only option. We decided to shed some light on the topic of studio lighting (sorry for the wordplay) and our friends from PhotoCASA magazine helped us in this.
Studio light
This post explains the specifics of shooting in a studio. But it doesn’t mean that it is applicable to only studio shoots where we are constrained by the background and interior. You can certainly apply this knowledge when shooting outdoors, taking photographs for catalogs or advertisement.
Most professional photographers organizing on-site shootings use a whole range of studio equipment (flashes, stands, reflectors, filters, smoking machines, etc.) and all this is necessary to create complex images of light and shade.
It’s certainly recommended to always start with one source imitating sunlight. You’ll have the time to upgrade the scheme afterwards increasing the number of sources according to your vision.
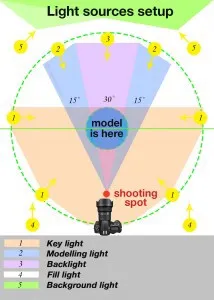
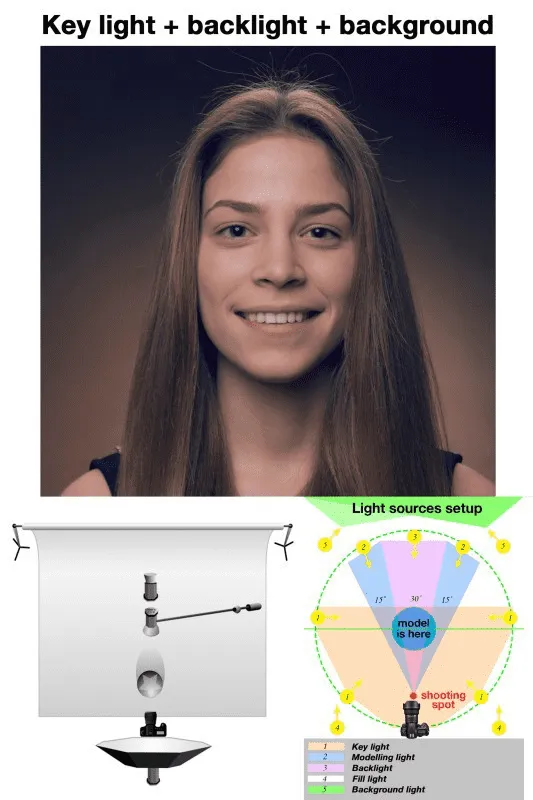
First, let’s look at the classical scheme of light sources.
Let’s examine it step by step:
1. Sources of key light are used to form an image. Usually it is a main source of light. Sources can be located on the same level as the object and in some cases above it.
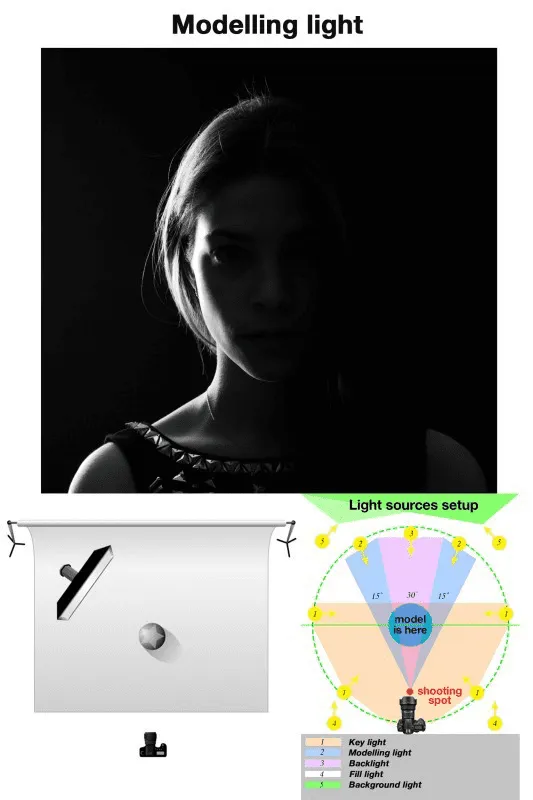
2. Modelling light is usually used to emphasize certain side of the object, to showcase its texture and to separate the darkened side from the background. Modelling light is aimed to the lens’ side and usually gives patches of light which reduces the contrast. In order to reduce the impact of light flare you can install a blend or use flags limiting the direct hit of light on the lens. So when you use smoke and snow, when you need to convey some texture to the shooting object, you should use these sources. Usually during outdoor shootings sunlight is located in the zone of modelling light.
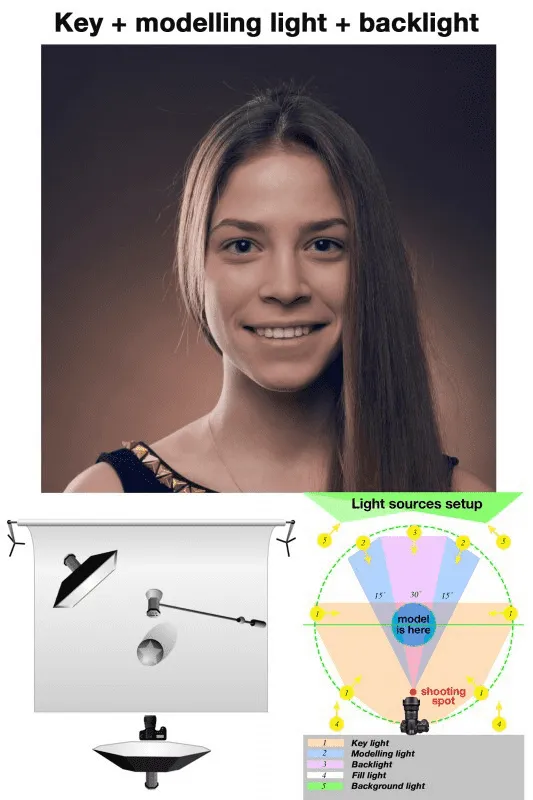
3. Backlight gives a bright halo around the model. It is used to light up hair, to create a light outline around the model, silhouette. It’s positioned behind the model trying to avoid light patches on a lens.
4. Background light is used to give a specific look to a scene’s background. It allows to create an additional atmosphere and to emphasize light and shade transition on a model. Reflectors and light modifiers are used to light up the background.
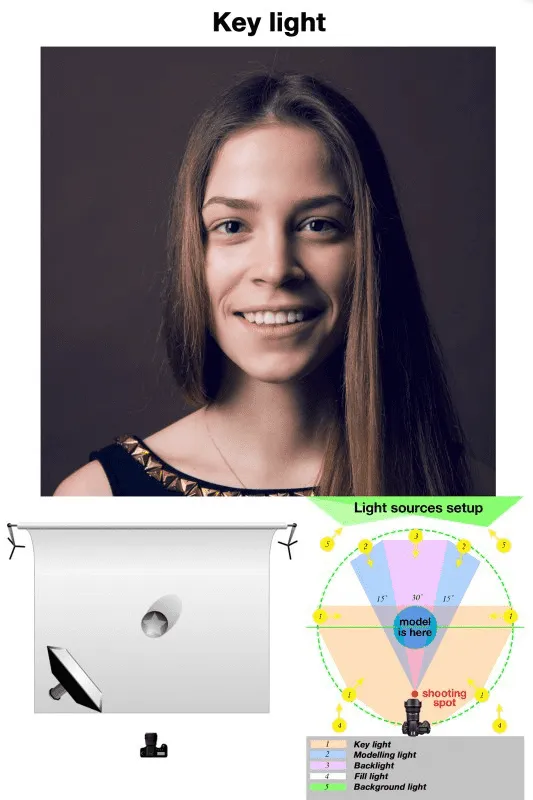
Key light was used here in the following way: we took an octabox, positioned it on the level with the model’s forehead and directed it to her side. As a result, we've got very soft shadows.
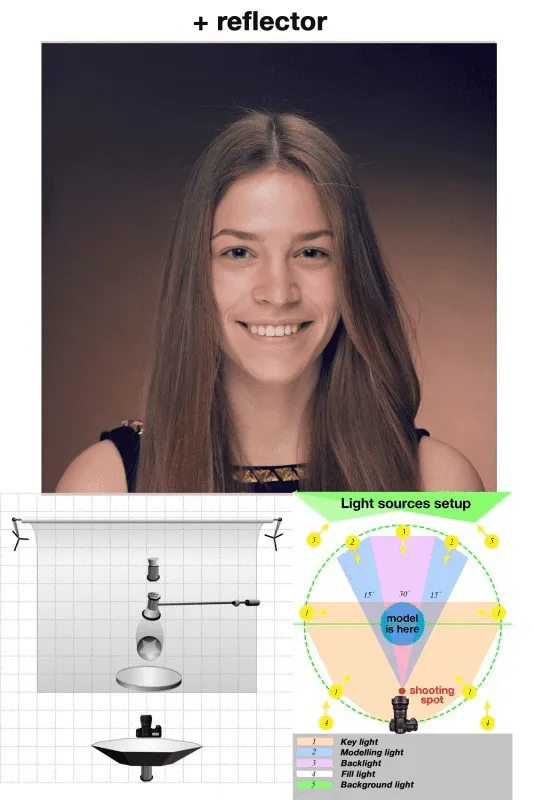
5. Sources of fill light are used to soften shadows coming from a key or modelling light. Fill light is not the main source and doesn’t produce deep shadows. Fill light can be reflected from the key light or modelling light using a reflector.
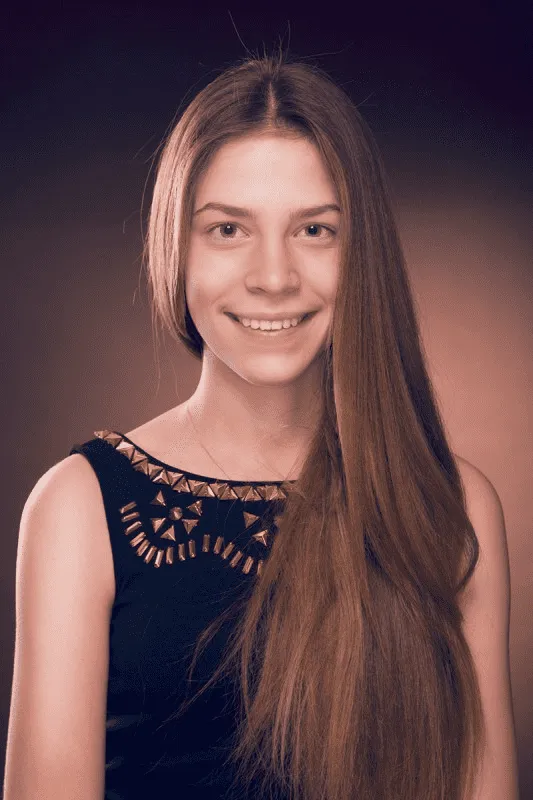
Creation of a quality studio portrait depends on knowing how to use a wide range of light modifiers and equipment. You should also pay your attention to learning such notions as exposure metering and selection of power capacities, impact of light modifiers and angles of light incidence, usage of light filters, combined flashes (permanent and impulse ones). The skill to keep up with the latest trends of the industry is also vital to a photographer.
The material was prepared in the photo studio Lokomotiv (Kiev) http://lokomotivs.io.ua.


